


.png)


This article will go through the steps to deploy a Java application into the Jazz platform.
This is a simple process as long as you follow those steps:
1 - Create an Eclipse Feature project
You need to create a feature project to include your plug-in as well as all the dependencies that your plugin needs to run successfully.
- Under the Plug-ins tab add your plugin to the Plug-ins and Fragments lists
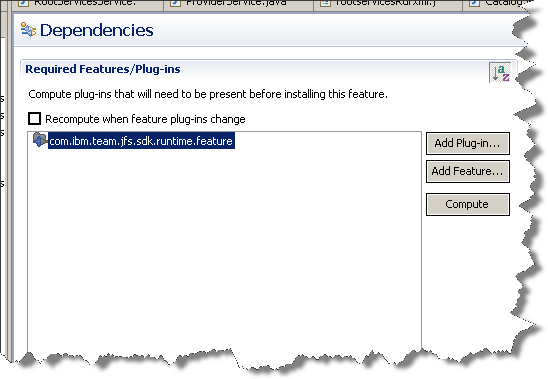
- In the Dependencies tab add the feature com.ibm.jfs.sdk.runtime.feature
- Save your feature project

2- Create an Eclipse Update Site project
Jazz applications are packaged as Eclipse update sites.
- Create an update site project and include your plugin feature you created in the previous step.
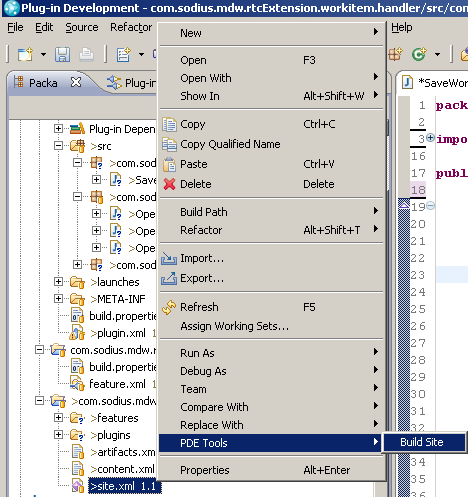
- Right click on the site.xml file and select PDE Tools -> Build Site to generate the update site content.
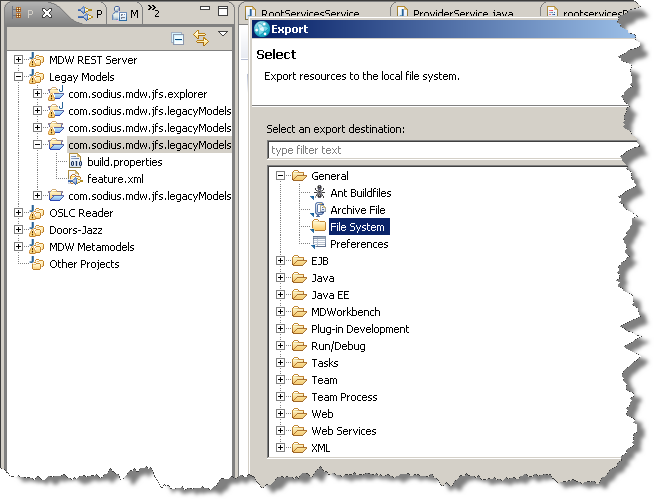
- Export your update project under the directory <Jazz_install_dir>server

3 - Provisioning the Application
If Jazz is running, stop it via the script server.shutdown found under <jazz_install_dir>/server directory.
- Create a directory YOUR_PLUGIN_NAME under <jazz_install_dir>serverconfYOUR_PLUGIN_NAME
- Create another directory named provision_profiles under the directory <jazz_install_dir>serverconfYOUR_PLUGIN_NAMEprovision_profiles
- Create a file named profile.ini under the directory created above with this content:
url=file:../YOUR_PLUGIN_NAME.updatesite
featureid=YOUR_PLGIN_NAME.feature
- Copy the YOUR_PLUGIN_NAME.properties file and the log4j.properties file to the directory serverconfYOUR_PLUGIN_NAME. Don't forget to change the port number of your front side URL to the Jazz server port number.
- Rename the renameme.war file found in the Jazz SDK to YOUR_PLUGIN_NAME.war and copy it under the tomcat webapps directory <Jazz_install_dir>servertomcatwebapps
4 - Reset and Re-start your Server
It is always recommended to reset the server to empty the cache to force the server to reload your plugins. To reset the server call this URL https:\<yourserver>:<port>jtsadmincmdrequestResetOnce the server has been reset, you can restart it. It will load your plugins defined by the features in the provisioning file you created earlier.
And voila, now you should be ready to access your deployed application.


Leave us your comment